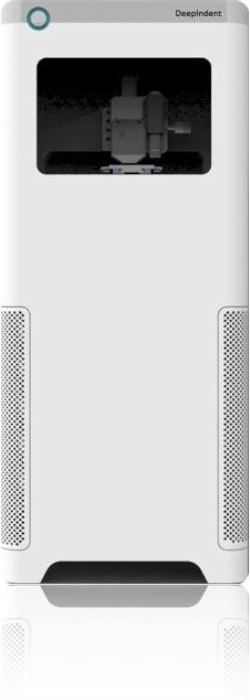
Nanatom - DeepIndent
Instrumented Indentation System
Nanatom’s Instrumented Nano and Micro Hardness Tester is designed to conduct instrumented indentation tests with high precision. This unique testing equipment is capable of measuring in various characteristics of materials like metals, alloys, ceramics, powder metallurgy materials, thin films in accordance with ISO and ASTM standards. DeepIndent is also capable of doing automatically a pre-designated array indents in a user defined paHern. The open architecture of this machine and its control system enables programming as per user’s requirement.
Features:
- Automatic Calculation of
- Vickers Hardness, Martens Hardness & Indentation Hardness
- Young’s Modulus & Reduced Modulus
- Indentation Creep & Indentation Relaxation
- Contact area & Contact depth
- Feedback control modes - Load and Displacement. Indent functions:
- Standard Function
- Trapezoid Function
- Partial Load-Unload Function
- Complete Unload Function
- Automated testing
- Fully automated Z, T & Y motion control
- Multi indent based on user defined paHern
- Testing In accordance with ISO 14577-1 and ASTM E2546
- DeepSense Testing and Analysis so]ware provides
- 2D and 3D Modulus and Hardness surface mapping
- Real time load-displacement plots
- Selectable Data acquisition rates from 1 to 75 kHz
- Results exportable to excel, csv, pdf and image files
- Sample Auto-Focus to quickly locate regions of interest
- Extended Depth of Focus to get crisp indentation images
- Built-in Self Calibration tools
- Flexible reporting format


- Dual cantilever flexure¤¤ indentation mechanism coupled with high resolution multi plate capacitive sensing elements provide unique noise free precision load and displacement sensing capabilities. This compliant mechanism is the heart of the machine. Carved out of a single metal block, backlash errors are reduced to a minimum. Higher rotational stiffness is ensured by double cantilever which minimises roll. Perfectly straight motion of the flexure ensures Yaw & Roll errors are negligible, which is essential to make sure the indenter tip is always perpendicular to the sample surface.
- Active vibration and Acoustic isolation to operate in a stable environment
- Translation stages with sub-micron accuracy for precise sample positioning and repeatability
- Granite load frame, high rigidity in excess of 108 N/m
- Range of indenters - Berkovich, Modified Berkovich, Micro Vickers, Conical & Ball
- Versatile EtherCAT based controller with multiple ADC and DAC channels for high speed and precise control

Fused Silica

Nano Indentation - Ni thin film
| NANO TRANSDUCER | ||||
| Load actuation | Electrostatic | Displacement Sensing | Capacitive | |
| Max Indent Load | 10 mN | Max Indent Displacement | 15 μm | |
| Indent Load Resolution | 1 nN | Displacecment Resolution | 0.02 nm | |
| Load Noise floor* | 100 nN | Displacement Noise floor* | 0.1 nm | |
| MICRO TRANSDUCER | ||||
| Load actuation | Piezo | Max Indent Displacement | 160 μm | |
| Max Indent Load | 5 N | Displacecment Resolution | 10 nm | |
| Indent Load Resolution | 10 μN | Displacement Noise floor* | 50 nm | |
| Load Noise floor* | 100 μN | |||
| IMAGING | |
| Optical system | Inline microscope Infinity corrected, Brightfield |
| Optical magnification | 20x APO Ultra-Long Working Distance Objective |
| Illumination | Fibre optic super bright LED |
| Camera | Sony IMX 249 CMOS 2.3 MP resoluution, 73 dB |
| MOTION | |
| Z Travel, Resolution | 50 mm, 50 nm |
| X Travel, Resolution | 160 mm, 100 nm |
| Y Travel, Resolution | 75 mm, 10 nm |
| Motor type | Servo with encoder |
| Linear motion | Cross roller guideways Precision Zero backlash ball-screw |
| SAMPLE | |
| Height | 25 mm |
| Bounding box / Radius | 25 mm3 / 25 mm |
| Net Weight | 1 kg |
| Sample scanning area | 80 X 50 mm |
| MACHINE | |
| Dimensions (L x D x H) | 750 x 500 x 1500 nm |
| Weight | 180 kgs |
| Power rating | 110 / 220 V |
| Current rating | 15 Amps |